This blog post is about installing Game of Active Directory (GOAD) on MacOS Intel architecture. GOAD is a free Active Directory LAB project for penetration testing. It is the perfect way to practice for the OSCP or CRTP exam.

Disclaimer
This article is for informational and educational purpose only, and for those who’re willing and curious to know and learn about Security and Penetration Testing. The content may not be used for illegal purposes. If you’re ready to learn something new for the good, then read on.
Why this blog?
The goal of this article is to show you how to set up a GOAD environment for MacOS based on VMWare Fusion and Docker. Five virtual machines running Windows Server 2016 make up the standard GOAD environment.
Unfortunately, Windows Server is only available for the x86_64 architecture (Intel/AMD). Beause of this, Windows Server 2016 is not compatible with the Apple Silicon architecture. This is likely the reason why the official GOAD installation site does not offer support for installing on macOS.
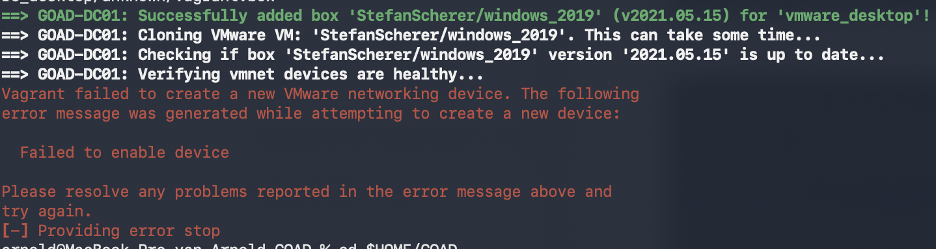
When I tried to install GOAD on my MacBook Pro with M4 chipset (Silicon / ARM), I encountered the following error message:

If you are using a MacBook running on Sillicon, you can install GOAD using x86 virtual machine emulators. This is very, very and very slow. Don’t do this.
However, I can highly recommend pen testers to buy a second-hand MacBook based on Intel architecture (2019). For years now, I have been happily using my 2018 MacBook Pro to work. I even prefer the Intel over the newer M4. For just 500 dollars, you can purchase an Intel MacBook Pro on eBay.
Why Intel over the newer Applie Silicon (M series)?
- Native x86 compatibility: Many standard pen testing lab and target environment are built on x86 architecture, such as GOAD
- Exploit compiling: Many target machines are based on the x86 architecture. Mostly you need exactly the same kernel version and architecture to compile the exploit.
- Wifi pen testing: Aircrack has much better-documented drivers and support in the Linux kernel compared to the proprietary nature of the Apple Silicon Wi-Fi stack.
Lab environment
Hardware requirements
You need the following hardware requirements in order to start the installation of GOAD (https://orange-cyberdefense.github.io/GOAD/installation/linux)
- MacBook based in Intel CPU (2019 or earlier)
- 24 GB RAM
- 115 GB free space
Software requirements
You need the following software:
- Python venv module
- VMWare Fusion
- Docker Desktop
- Vagrant
- Ansible
In this blog post, we will discuss the following topics:
Section 1; Installation software requirements
Section 2; Installation of GOAD on MacBook Intel
Section 3; Starting GOAD
1. Installation software requirements
Installation of python
You need Python version 3.8 or higher (we used 3.14.3) to install the venv module for creating a “virtual environment”
- Installation of Python venv
pip3 install virtualenv

Installation VMWare Fusion
The 5 GOAD VMs will be installed on VMWare Fusion. VMware Fusion Pro is free for personal, non-commercial use.
2. Installation VMWare Fusion
Register an account at https://profile.broadcom.com/web/registration
Login with your account at https://support.broadcom.com/c/portal/login
Navigate to the free products https://support.broadcom.com/group/ecx/free-downloads.
Search for VMWare Fusion and select your version (we used 13.6.4). You need to click on the link “Terms and Conditions” and then select the radio button).

Download the VMWare Fusion *.dmg file ((VMware-Fusion-13.6.4–24832108_universal.dmg).
Double click the *.dmg file to start the installation wizard. The installation screens are self-explanatory, so I won’t go into detail about them in this article.
Installation Docker Desktop
3. Installation Docker Desktop
Navigate to https://docs.docker.com/desktop/setup/install/mac-install/
Download the Docker Desktop *.dmg file for the Intel chip (Docker.dmg).
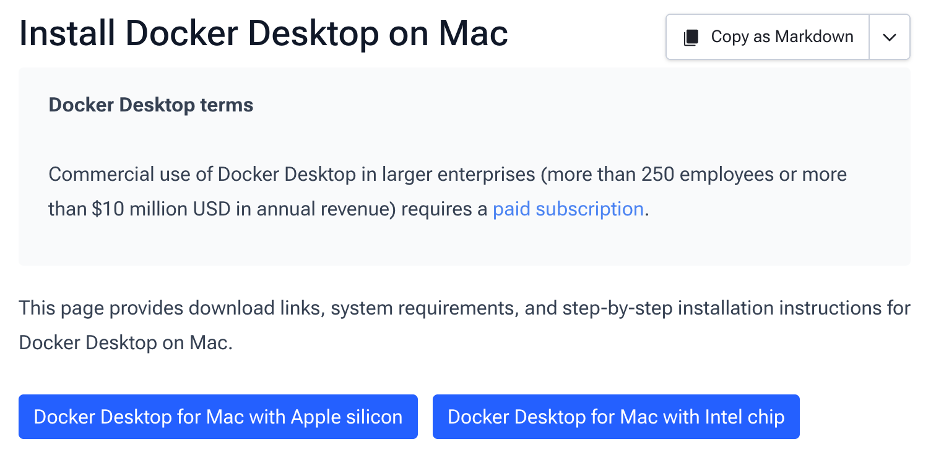
Double click the *.dmg file to start the installation wizard. Also, these installation screens are self-explanatory, so I won’t go into detail about them in this article. You should use the Docker recommended settings.
Installation Vagrant
Vagrant, an open-source tool developed by HashiCorp, this tool is used to create, manage, and automate virtual machine (VM) environments.
4. Install Vagrant
brew tap hashicorp/tap
brew install hashicorp/tap/hashicorp-vagrant

5. Install Vagrant VMWare utility
brew install vagrant-vmware-utility

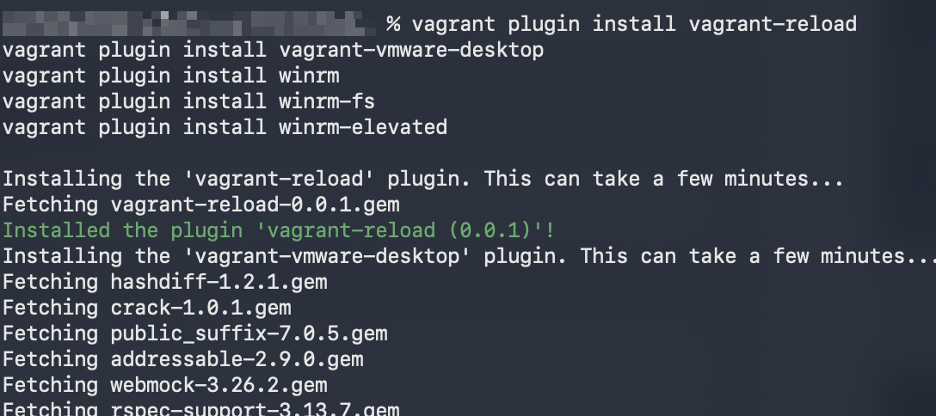
6. Install Vagrant plugins
vagrant plugin install vagrant-reload
vagrant plugin install vagrant-vmware-desktop
vagrant plugin install winrm
vagrant plugin install winrm-fs
vagrant plugin install winrm-elevated
Installation Ansible
Ansible is an open-source, agentless IT automation engine used for configuration management, application deployment, and task automation.
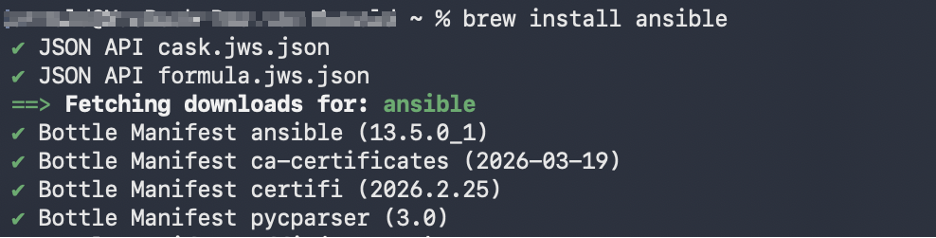
7. Install Ansible
brew install ansible
2. Installation GOAD
Next, we will install GOAD. It’s important to note that this installation takes a few hours. We did get some error messages that occured at the start of the installation. To clear the error messages, all you have to do is restart the installation.
During the installation, do not open the GUI applications VMWare Fusion and Docker Desktop. The 5 GOAD VMs will be installed in virtual network 192.168.10.0/24.
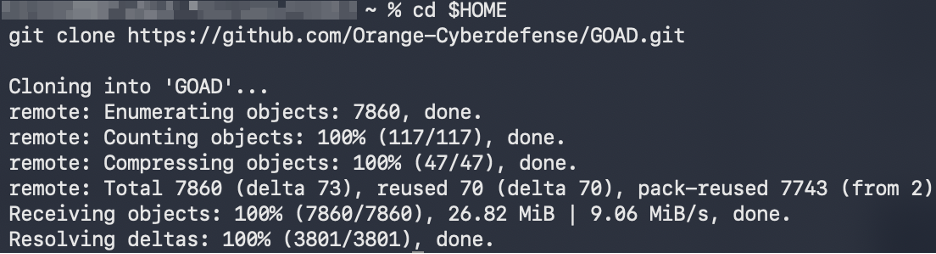
8. Download the GOAD sources
cd $HOME
git clone https://github.com/Orange-Cyberdefense/GOAD.git
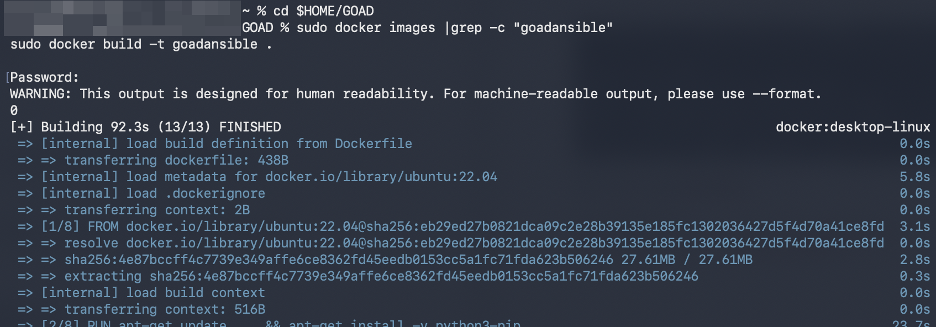
9. Build Docker image ‘goadansible’
cd $HOME/GOAD
sudo docker images |grep -c "goadansible"
sudo docker build -t goadansible .
10. Install GOAD
cd $HOME/GOAD
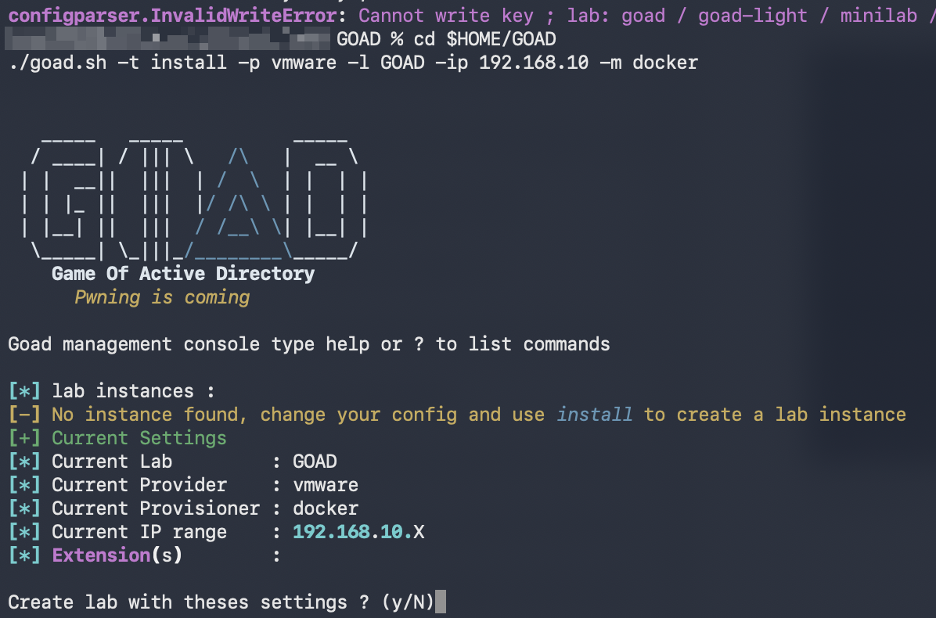
./goad.sh -t install -p vmware -l GOAD -ip 192.168.10 -m docker
You may encounter the following error:
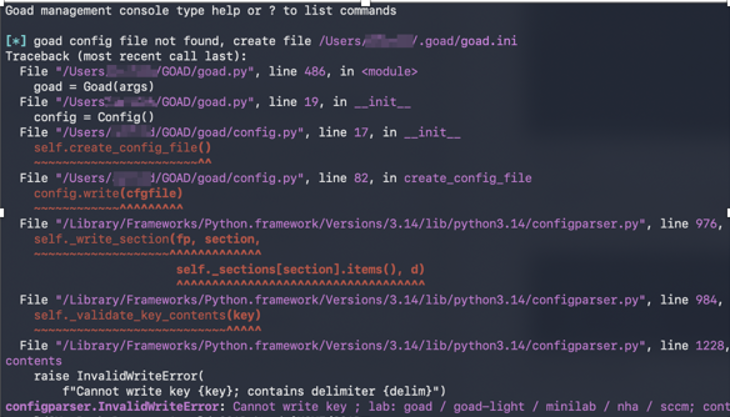
Cause: the goad.ini file was not found. Just restart the installation and you’re fine (step 10).
11. Confirm the lab settings.
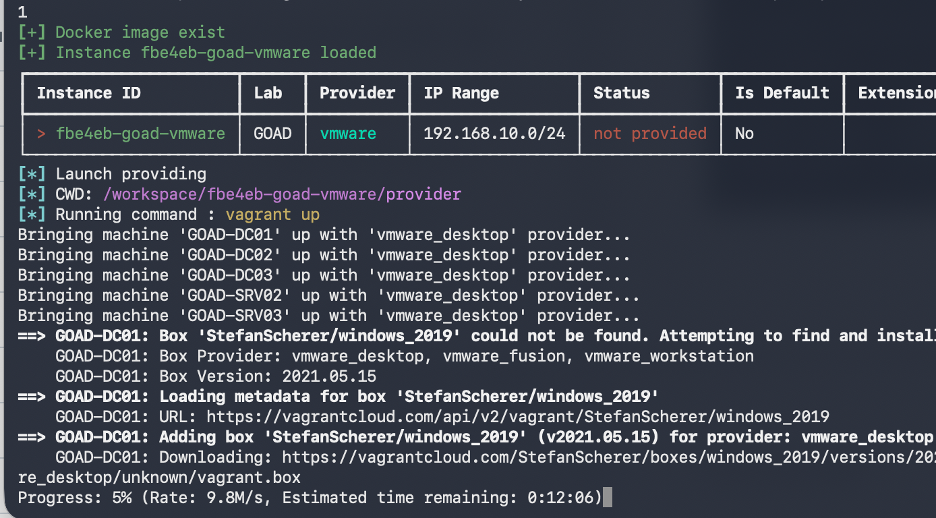
Next, the VMWare images will be downloaded from the vagrant cloud.
You may get the following error:
Cause: Ansible timing sensitivity. Just restart the installation and you’re fine (step 10).
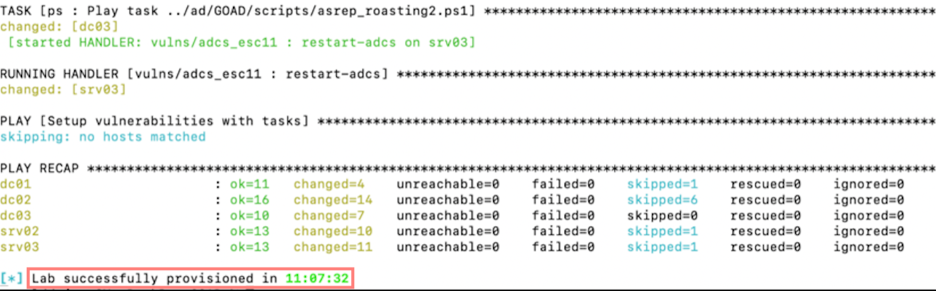
Now, continue the installation until the end (couple of hours).
3. Starting GOAD
To stop and start the entire GOAD lab environment, use the goat.sh script. It takes about 2 minutes to start. My advise is to start the VMWare Fusion console after the last GOAD machine (SRV03) is started.
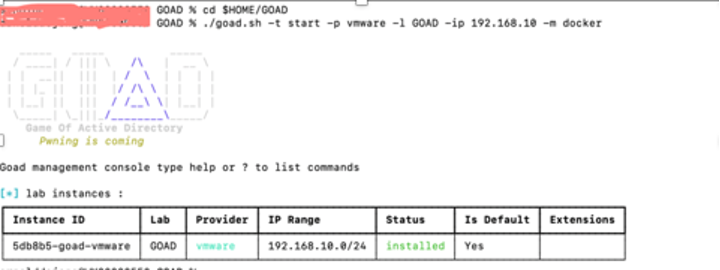
12. List the GOAD instance id. Execute the following command:
cd $HOME/GOAD
./goad.sh -t start -p vmware -l GOAD -ip 192.168.10 -m docker
13. Start GOAD lab by instance id. Add the instance id with the -i switch.
./goad.sh -t start -p vmware -l GOAD -ip 192.168.10 -m docker -i 5db8b5-goad-vmware

Wait about 2/3 minuten until the last machine (GOAD-SRV03) is started.

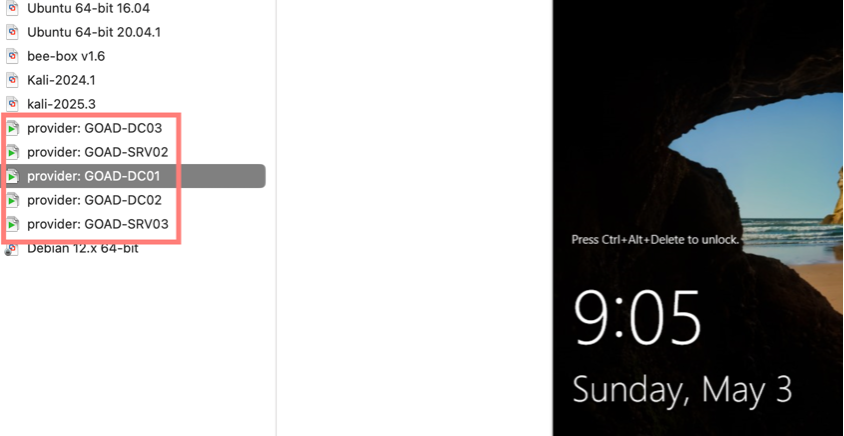
14. Open VMWare Fusion lab inventory to see if all machine are up and running.
15. If you want the shutdown all machines, just exectute the following command:
./goad.sh -t start -p vmware -l GOAD -ip 192.168.10 -m docker -i 5db8b5-goad-vmware

References
https://orange-cyberdefense.github.io/GOAD/installation/linux
https://www.python.org/downloads/macos/
https://docs.docker.com/desktop/setup/install/mac-install/
https://developer.hashicorp.com/vagrant/install
https://docs.ansible.com/projects/ansible/latest/installation_guide/intro_installation.html
https://www.youtube.com/watch?v=mpYJkurzjOA (Hack the Clown)
Install GOAD on MacOS. was originally published in System Weakness on Medium, where people are continuing the conversation by highlighting and responding to this story.